At Recreation Revolution, we've seen firsthand how the Snowdog tracksled has revolutionized winter hauling and adventure. Over the years, we've proudly offered a vast range of these versatile machines, helping countless customers from ice fishers and trail groomers to remote cabin owners conquer the snowy terrain.
If you’re interested in buying a new machine, be aware that not all of these models are available, but if you’re looking for a used machine, this guide may be helpful in determining what you’re looking at!
Choosing the right Snowdog means understanding the subtle yet significant differences between models. Let's break down the core lineup we've carried, highlighting what makes each machine unique, from the original workhorses to the specialized heavy haulers.
Snowdog Models: An Evolutionary Lineup & Engine Specs
The primary differences in Snowdog models come down to size, power, and features, which directly impact performance in different conditions. Briggs & Stratton engines are used in all gas models.
|
Model |
Track Length |
Engine HP |
Primary Focus |
Approx. Towing Capacity (On Ice) |
|---|---|---|---|---|
|
Compact |
Shorter (Single) |
7 HP, 10 HP, 13.5 HP |
Portability & Easy Transport |
600 lbs (272 kg) |
|
Standard |
Longer (Single) |
10 HP, 13.5 HP |
Deep Snow Performance |
1,000 lbs (450 kg) |
|
Long Track |
Longest (Single) |
13.5 HP |
Deep Snow Hauler |
660 lbs (300 kg) |
|
NEW Compact |
Shorter (Single) |
10 HP Only |
Portable & Easy to Transport |
600 lbs (272 kg) |
|
Sport |
Longer (Single) |
13.5 HP |
Comfort & Convenience |
1,000 lbs (450 kg) |
|
Twin Track |
Twin Track (Dual) |
14 HP |
Max Traction & Load Stability |
1,100 lbs (500 kg) |
|
SnowdogX |
Longer (Single) |
14 HP |
Power and Agility, in electric |
1,000 lbs (450 kg) |
|
Snowdog Trail |
Longer (Single) |
13.5 HP |
Comfort & Convenience with added tools for Trail Grooming |
1,000 lbs (450 kg) |
Note: Towing capacity is highly dependent on surface conditions. The high end of the range is typically achievable on hard-packed snow or glare ice.
The Compact (B7ZE, B10ZE, B13ME)

The Compact is the portability king, featuring three primary gas engine options, all with the reliable Briggs & Stratton (B&S) brand.
-
Engine Range: 7 HP, 10 HP, and 13.5 HP.
-
Performance Note: The 7 HP (B7ZE) is typically the lightest option and ideal for light hauling or packed snow. The 10 HP and 13.5 HP options offer significantly more torque and power for mild powder and heavier loads, while still retaining the compact frame.
-
Approx. Dimensions: 50 in. (L) x 24 in. (W).
-
Compact models had a heavy nylon cover that came in Black, White Camo or Green Camo patterns, with a zip-open hood for ventilation and engine access.
-
The original Compact machines did not come with a Reverse Gear option, but we’ve successfully transplanted the MER Upgrade kit into several of these. It’s possible!
-
This version of the compact is no longer in production, but there are still many of them in the wild!
The Standard & Utility (B10ZE, B13MER)

The Standard model is built for tougher conditions with a longer track (longer than the
Compact) for better flotation. It focuses on the mid-to-high horsepower range. The Utility version was only available for a short time, and is identifiable by an improved handlebar adjustment feature.
-
Both the Standard and Utility models had a heavy nylon cover that came in Black, White Camo or Green Camo patterns, with a zip-open hood for ventilation and engine access.
-
These models had a composite (wood-plastic material).
-
Engine Range: 10 HP and 13.5 HP (B&S).
-
Performance Note: The longer track, paired with the 13.5 HP engine (often denoted by the MER in the model code, indicating Manual Start, Electric Start, and Reverse), is the workhorse configuration, perfect for consistent deep snow and heavy hauling.
-
The Standard was available with or without the Reverse Gear Kit. MER (Reverse Gear Kits) are still available for some models.
-
Approx. Dimensions (Transport): 58 in. (L) x 24 in. (W).
-
All of the soft-sided Snowdog models have been discontinued, but there are still occasional sightings everywhere!
The Sport (B13 MER)

The Sport model comes in one premium configuration, maximizing both power and comfort.
-
Engine: 13.5 HP Briggs & Stratton engine.
-
Key Features: The Sport is defined by its integrated features like the full hard plastic hood, steel deck with anti-vibration mounts for the engine, standard Reverse gear, and heated hand grips. It uses the longer track length (same as the Standard and Utility models) for superior deep snow performance.
-
Approx. Dimensions: 58 in. (L) x 22.5 in. (W).
-
These are still actively in production, and there are still many of these tried-and-true machines available!
The NEW Compact (10 HP Only)

The updated Compact model often comes in one premium configuration, maximizing maneuverability, portability and comfort.
-
Engine: Primarily the 10 HP Briggs & Stratton engine.
-
Key Features: The Compact features the new full hard plastic hood, steel deck, standard heated hand grips, but NO Reverse Gear (to save on weight). It uses the shorter track length (same as the previous Compact models) for superior steering performance on trails or other tight spaces.
-
Approx. Dimensions: 50 in. (L) x 22.5 in. (W).
-
New! And available now!
Long Track

The Long Track is uniquely distinguished by its overall length and is designed for specialized heavy work and the deepest snow. It’s the Sport machine… but stretched!
-
Engine: Primarily the 13.5 HP Briggs & Stratton engine
-
Key Features: The Long Track is defined by its significantly longer track and chassis. It uses the longer track length (70” long) for superior deep snow performance.
-
The Long Track model was discontinued in 2022, but there are many of them in Canada and the US still in use!
Twin Track

The Twin Track (aka The Beast!) was a limited production machine, with some very unique features. It had a 14 HP Briggs & Stratton engine, and featured two (2) separate tracks that were driven simultaneously. The Twin Track had a gear selector for High, Low and Reverse Gears, which gave it power or speed when needed most!
-
Engine: 14 HP Briggs & Stratton engine
-
Key Features: The Twin Track is defined by its significantly larger chassis and side by side tracks for maximum stability and performance in very deep snow.
-
The Twin Track has ample storage on both sides of the engine, and as well as a storage area behind the engine.
-
The Twin Track has all of the same features as the Sport, and Long Track models, including plastic sides, electric start, remote choke, and heated grips.
-
The Twin track was discontinued in 2022 and there are very few that we know of in use right now. If the legends are true, you’d have to be far afield to see one of these in the wilderness.
SnowdogX

The SnowdogX is the evolution of Snowdog, an all-electric version of the popular Sport machine. It features a removable 72-volt battery (and space for a second battery to double the range) and a removable on-board generator to extend your range whenever you need. The SnowdogX does not require the generator to operate, it only charges the batteries (or your electronic devices).
-
Engine: 72-volt power system and a single electric motor
-
Key Features: Quiet operation, and excellent throttle response. Batteries can be switched out or added easily. It also features an electronic braking system and an upgraded LED light.
-
It’s blue! It has blue colored hard plastic sides for durability and ease of access.
-
It has distinctive blue side panels for increased protection and a larger LED light than previous Snowdog models.
-
Brand new, and currently in production! If you’re an early-adopter, this might be the one for you!
The Snowdog Trail

Snowdog Trail was developed by North American experts who have extensive experience in using Snowdog for grooming trails.
The Snowdog Trail comes fully equipped*. The kit includes:
-
Snowdog Sport
-
Groomer
-
Twist towbar and Twist adapter.
-
Shock absorbing bar.
-
Powerful 80 W headlight.
-
Reinforced O-ring chain.
-
Flexible mudflap.
-
Metal handguard.
-
Chainsaw holder.
-
2.6 US gallon extra fuel container.
-
Handlebar brackets and holders for gear.
* The actual appearance of the attachments and accessories may differ from the presented images.
-
Engine: 13.5 HP Briggs & Stratton engine.
-
Key Features: The Snowdog Trail is based on the Sport design, and features the full hard plastic hood, standard Reverse gear, and heated hand grips. It uses the longer track length (same as the Standard and Utility models) for superior deep snow performance.
-
Approx. Dimensions: 58 in. (L) x 22.5 in. (W).
-
The Snowdog Trail will be available for purchase in the 2026-2027 Model Year
How to Identify Your Snowdog Model
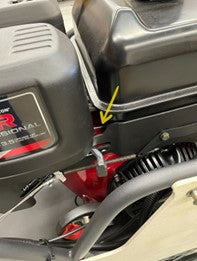
Need to order a part or just curious about the specific machine you own? Every Snowdog has a serial number stamped on it that will tell you the year it was made, and give you specific model information!
Need help finding your serial number? ← click this link for a related guide on how to find your machine’s serial number!
]]>