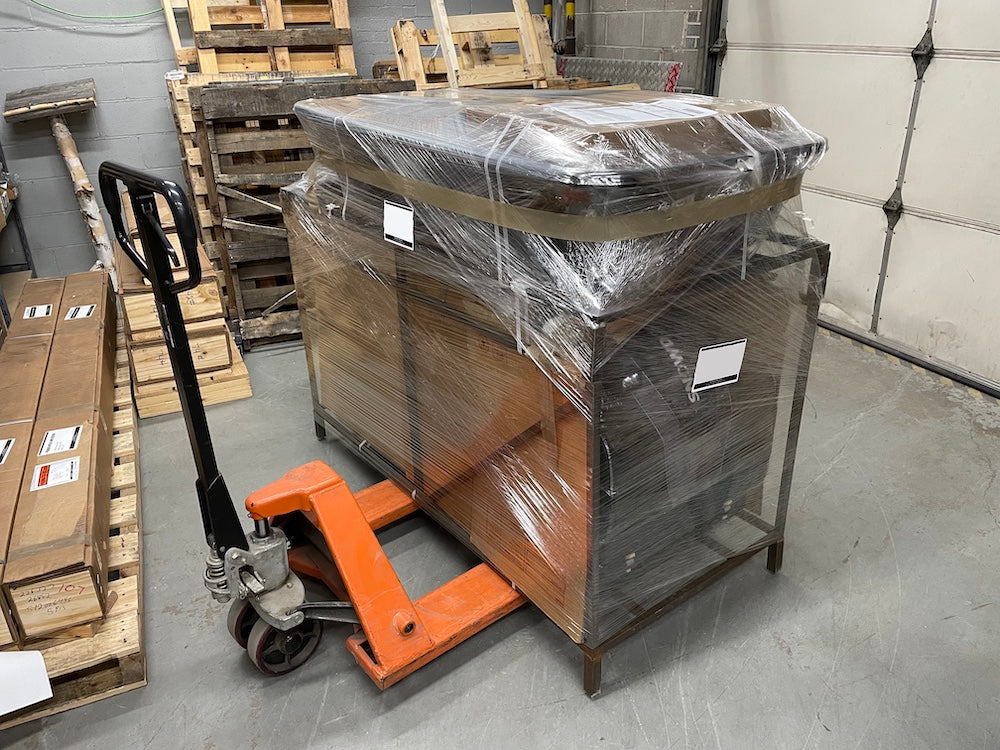
Did you know that we can ship a complete Snowdog kit (Snowdog, seat and sled) to any major center in Canada for as little as $150? Yup! It's easier than ever to get outside in style this winter, whether you're ice fishing, trail grooming, hunting or hauling wood.
Our new drop-ship option saves you time and money, and we're excited that we've been able to help more than a few Snowdogs find their forever homes in places like Saskatoon, Abbotsford, Calgary and even Grand Falls-Windsor, Newfoundland (it costs a bit more to get to Newfoundland, though).
Shipping Snowdogs and Snowdog accessories to far-off places involves a little more than putting it all in some cardboard boxes and packing peanuts, as you can imagine, and if we do happen to ship "factory direct", it means you have a little work to do at the unboxing party. We wanted to give you a quick heads up about what to expect so that there are no surprises.
Bring the Team
Even if your Snowdog is being delivered to your house, it will need to be unloaded from the truck. If there's no ramp or power tailgate service available, you'll need some extra hands to get your Snowdog off the truck. Lift with the knees!
You'll need some tools
Snowdogs come from the factory in snazzy little metal crates, and the Snowdog is usually shrink-wrapped and wire-tied from the track frame to the crate to keep it from wandering off during transport. You'll need pliers or heavy wire cutters to get the ties off. You might also need a utility knife to carefully remove the plastic wrapping from the Snowdog. Bonus - this crate makes as a great base for a wood shed, bench, or to lock up your ice fishing buddies if they catch more than you!
Some Assembly Required
There are only two things you need to do once you've completely removed the bubble-wrap and shrink-wrap from the machine, and once it's been freed from its crate:
- Unwrap and install the top frame piece that fits under the engine cover. Remove the two cover screws on both sides of the engine (at the top), insert the frame piece with the tab point towards the back of the machine.. it goes between the frame and the cover. Screw the cover back down (through the frame piece) and that's it.
- Connect the battery. Use a Phillips Head (+) screwdriver to connect the wires to the battery terminals: red to positive, black to negative.
- Put some gas in the tank, turn on the "run" switch, make sure the safety kill switch is in, and test the electric start! After a few seconds, it should start. (to save the starter motor, do not run the starter for more than 5 seconds at a time.)
- If you're still reading, it's actually five things. We know that now.
- Attach the hitch to the sled
- Assemble the Seat, and install it on the sled.
This is a good time to hydrate.
Time for Paperwork!
In order to ensure that you have full warranty coverage, we'll need you to complete the warranty registration form that is in the handy zipper pocket of the cargo area. Fill that in, scan it (or take a photo) and email it to us and we'll get you registered immediately.
Time to Ride!
Assuming the conditions are right it's a good idea to take your Snowdog out for a test run, so you can practice turning, starting, stopping, and in some cases, proper "falling out" techniques. Please note that "right conditions" include:
- Snowing or Not Snowing
- Spring, Summer, Fall, Winter
It won't take long before you get the hang of the Snowdog steering.
Remember that the secret to a good long-term relationship with your Snowdog is the proper care and feeding of your new dog. Take some time to look through the manual and plan for regular oil changes and frequent chain lubrication. Also make a note to tighten all the bolts on the engine platform at least once a season.
We hope you enjoy your new Snowdog!


Share: